Kategorien
Allgemein Webentwicklung Werkzeuge

Webdriver und das Problem mit dem unsichtbaren Text.

Neulich stand ich vor einem Problem, in dem ich mittels PHP-Webdriver versuchte, portentiell versteckten Inhalt aus einer Seite auszulesen.

Leider ist es so, dass das ganze nicht funktioniert, wenn der Inhalt versteckt ist. Dann wird zwar das Element gefunden, wenn man $element->getText() nutzt, wird aber null bzw ein leerer String ausgegeben. Das ist natürlich unschön und Webdriver selbst hat auch keine Möglichkeit, das DOM selbst zu verändern.

Aber natürlich gibt es einen Weg, dafür zu sorgen, dass man die Inhalte auslesen kann, immerhin muss das Element einfach nur sichtbar sein. Aber was, wenn das Element selbst nicht unsichtbar ist, sondern ein Eltern-Element das verursacht?

Hier die mögliche Lösung

PHP-Webdriver hat die Möglichkeit, einen Javascript-Codeblock an den Browser zu senden (analog zu browser.execute), der zweite Parameter von executeScript wird als arguments[] an die JS-Funktion übergeben. Damit bekommen wir das zu untersuchende Element.

In einer While-Schleife geht es dann (wenn ein Element nicht sichtbar ist) Element für Element nach oben. Dabei bekommt jedes einzelne Element ein display: block !important gesetzt.

Sobald ein überordnetes Element sichtbar ist, sind wir fertig. Eine while-Schleife stellt hier eine einfache Möglichkeit dar, den DOM-Tree rekursiv hochzuwandern.

Es besteht dabei auch die Möglichkeit, ein Element aus diesem Codeblock, der in eine Lambda-Funktion (auch “anonyme Funktion”) gepackt wird, zurückzugeben und das Element in PHP weiterzuverarbeiten. Allerdings müsste das Element dann zwischen den beiden Umgebungen ständig das Element für meine Schleifen hin- und hergereicht werden, das ist vermutlich weniger performant, als das einmal am Stück durchzugehen und das komplett in Javascript durchzuziehen, ohne vorher zurückzuspringen.

    /**
     * @param Client $client
     * @param RemoteWebElement $element
     * @throws \Exception
     */
    private function makeElementTreeVisible($client, $element): void
    {
        if (!$element->isDisplayed()) {
            $response = $client->executeScript('
                var element = arguments[0];

                function isVisible(elem){
                    return !!( elem.offsetWidth || elem.offsetHeight || elem.getClientRects().length )
                    && window.getComputedStyle(elem).visibility !== "hidden";
                }

                while (!isVisible(element) ) {
                    element.setAttribute("style", "display: block !important")
                    element = element.parentNode;
                }
            ', [$element]);
        }
    }

Vermutlich nicht die super-perfomanteste Weise, aber zumindest sollten damit alle Edge Cases abgebildet sein.

Andere Möglichkeiten wären noch: den Style für alle Elemente setzen oder versuchen alle CSS-Styles zu entfernen (hilft halt nicht gegen Inline-Styles).

Habt ihr dieses Problem schon einmal gehabt? Wie habt ihr das gelöst?

Kategorien
Betriebssystem Code Werkzeuge

PHP, Docker, SELinux

When you try to use the PHP Docker Script from my previous post on a Linux distribution that uses SELinux (like Fedora), you might experience some problems.

Basically the Container will not have access to any of the required volumes like:

  • your project files
  • /etc/passwd
  • /etc/group
  • ~/.cache/composer
  • ~/.config/composer
  • ~/.ssh
  • the SSH agent socket

Is SELinux to blame?

To find out if your permission problems are really caused by SELinux you can temporarily disable access blocking:

sudo setenforce 0

When the files are accessible now, you know it’s SELinux. Make sure you turn on enforcing after you’re done testing:

sudo setenforce 1

The Z-flag

You could try to add the Z flag to the volume mapping but this is not recommended!

With the Z-flag set Docker will change the SELinux context of the files inside that volume (similar to a chcon call).

This might be OK for your project files but is highly discouraged for system files like /etc/passwd.

Detecting the problems

SELinux has a very extensive log at /var/log/audit/audit.log. It will log most of the time to this file when access was denied or granted.

In the case of my Docker container some of the problems did not show up in the audit log. To make sure all problems are logged you can use this command:

sudo semodule --disable_dontaudit --build

-D –disable_dontaudit
Temporarily remove dontaudits from policy. Reverts whenever policy is rebuilt

semodule man page

Analyse the log

The log entries you are interested in look like this:

type=AVC msg=audit(1573154170.047:519): avc: denied { read } for pid=37461 comm=„bash“ name=„passwd“ dev=„dm-1“ ino=1879487 scontext=system_u:system_r:container_t:s0:c61,c1013 tcontext=system_u:object_r:passwd_file_t:s0 tclass=file permissive=0

Excerpt from the audit.log

Important here are these parts:

  • the request was denied
  • scontext contains container_t
  • a request was made to a file Composer needs to access

audit2allow to the rescue!

Now we can start fixing the problems using audit2allow.

This tool analyses all failed entries of the SELinux audit log and generates a configuration that allows them.

First you copy all related audit log lines into a new file (let’s call it allow.log).

After that you pass the contents of the file to audit2allow and let it build a module:

cat allow.log | audit2allow -M containermods

Finally you need to load active the build module.

sudo semodule -i containermods.pp

This change is permanent and will survive reboots.

And repeat and repeat and…

You will most likely have to repeat the steps described above multiple times until everything is working smoothly. This means:

  • watch the audit log
  • try running the Composer command
  • append the related denied lines to allow.log
  • call audit2allow and load the module
  • repeat
Kategorien
Allgemein Code Werkzeuge

Running PHP with Docker

As a developer who works on multiple projects you often need different PHP versions for running tests or installing Composer packages.

I created a little Bash script that runs Docker for executing PHP in your project context. The script looks like this (don’t be scared, I will walk you through it step by step):

#!/usr/bin/env bash

phpVersion=7.2
remainingArguments="$@"

if [[ "$1" =~ (5.6|7.0|7.1|7.2|7.3) ]]; then
    phpVersion=$1
    remainingArguments="${@:2}"
fi

echo "Using PHP version $phpVersion"

docker run  --interactive --rm --tty \
    --user $(id -u):$(id -g) \
    -v ${HOME}/.ssh:${HOME}/.ssh:rw \
    -v ${SSH_AUTH_SOCK}:/ssh-auth.sock \
    --env SSH_AUTH_SOCK=/ssh-auth.sock \
    -v /etc/passwd:/etc/passwd:ro \
    -v /etc/passwd:/etc/group:ro \
    -v ${HOME}/.config/composer:${HOME}/.config/composer:rw \
    -v ${HOME}/.cache/composer:${HOME}/.cache/composer:rw \
    --env COMPOSER_CACHE_DIR=${HOME}/.cache/composer \
    --env COMPOSER_HOME=${HOME}/.config/composer \
    -v "$(pwd)":"$(pwd)":rw -w "$(pwd)" \
    --add-host db:127.0.0.1 \
    --net=host \
    intera/docker-ci-php:${phpVersion}-ubuntu \
    php${phpVersion} ${remainingArguments}

The script can be used like this:

php.sh 7.3 vendor/bin/phpunit

The first argument 7.3 is the PHP version. After that you can provide the arguments to the PHP command. The example above would run phpunit with PHP version 7.3.

You can also omit the PHP version argument and it will use the default PHP version that is defined in the script. The following command executes phpunit with PHP 7.2:

php.sh vendor/bin/phpunit

Argument Handling

The first block of the script handles the PHP version switching and extracting the remaining arguments that should be passed on to the PHP command.

By default PHP 7.2 is used and all arguments are passed on:

phpVersion=7.2
remainingArguments="$@"

If the first argument is a known PHP version it overwrites the default version and is removed from the arguments that are passed on:

if [[ "$1" =~ (5.6|7.0|7.1|7.2|7.3) ]]; then
    phpVersion=$1
    remainingArguments="${@:2}"
fi

The docker command parts

Let’s walk though the different parts of the docker command.

The first parameters will start an interactive terminal. Without them you won’t get nicely colored output:

--interactive --tty

The container is removed after the command is finished:

--rm

We switch the user and group to the currently logged on user to prevent permission problems. We also need to mount /etc/passwd and /etc/group. Otherwise the container would not know about the name of the current user and his groups. These volumes can be read-only (:ro).

--user $(id -u):$(id -g) \
-v /etc/passwd:/etc/passwd:ro \
-v /etc/passwd:/etc/group:ro \

The Composer directories from the user’s home directory are mounted to make sure the Composer cache is persisted and it has access to its config:

-v ${HOME}/.config/composer:${HOME}/.config/composer:rw \
-v ${HOME}/.cache/composer:${HOME}/.cache/composer:rw \
--env COMPOSER_CACHE_DIR=${HOME}/.cache/composer \
--env COMPOSER_HOME=${HOME}/.config/composer \

The current directory is mounted as a volume and the working directory of the Docker command is changed to this directory. Without access to your project files executing PHP would not make much sense 😉

Important! Please be aware that all files required by PHP (or Composer) must be subfolders of the current working directory. Symlinks that point outside that folder will not work.

-v "$(pwd)":"$(pwd)":rw -w "$(pwd)" \

The network part

In some of my (TYPO3) projects a Composer script is executed after install / update that needs access to the database (TYPO3 Console).

The database is running in a docker container and its port is mapped to my localhost. This allows me to use the following configuration:

--net=host \
--add-host db:127.0.0.1 \

The net=host option connects the container with the host network which allows it to access the database.

With add-host you can add additional hostname entries. In my case the Docker container running the database is called db which is also used as database hostname in the application config. With the entry above the db host will be resolved to your localhost.

The SSH part

This part is only required when you need SSH authentication. A common use case is loading private Git repositories via Composer.

The .ssh folder is mounted from the user’s home directory. This gives us access to the SSH config, the key files and the known_hosts file. You might be able to change this to a read-only volume when neither of these two conditions apply:

  • not all SSH hosts are present in your known_hosts file and SSH needs to update it
  • you are using a persistent SSH connection (ControlMasterControlPathControlPersist) and its path is located in your ~/.ssh folder

We also forward the socket of your SSH agent to use passwordless authentication:

-v ${HOME}/.ssh:${HOME}/.ssh:rw \
-v ${SSH_AUTH_SOCK}:/ssh-auth.sock \
--env SSH_AUTH_SOCK=/ssh-auth.sock \

The image

The Docker image is custom made and based on Ubuntu and the awesome PPA of Ondřej Surý.

It is publicly available on Docker Hub in PHP version 5.6 to 7.3.

The tag is switched depending on the selected PHP version.

Of course you can use your own image.

intera/docker-ci-php:${phpVersion}-ubuntu \

The PHP command (finally!)

The PHP command is switched based on the selected PHP version.

Finally the arguments passed to the command are forwarded to Composer.

php${phpVersion} ${remainingArguments}

Composer addon

The Docker images described above already contain a Composer executable at /usr/local/bin/composer.phar. This is an example to make use of it:

php.sh /usr/local/bin/composer.phar install

You can make your life even easier when you wrap the command above in another shell script that directly calls Composer:

#!/usr/bin/env bash

THIS_SCRIPT_DIR="$( cd "$( dirname `readlink -f "${BASH_SOURCE[0]}"` )" >/dev/null && pwd )"

phpVersion=7.2
remainingArguments="$@"

if [[ "$1" =~ (5.6|7.0|7.1|7.2|7.3) ]]; then
    phpVersion=$1
    remainingArguments="${@:2}"
fi

${THIS_SCRIPT_DIR}/php.sh ${phpVersion} /usr/local/bin/composer.phar ${remainingArguments}

Now you can just call

composer.sh install

SELinux

There might be issues with Linux distributions using SELinux.

I will publish another article soon that will provide solutions to these problems.

Kategorien
Allgemein Werkzeuge

Automate all the things

Wer hasst es nicht, Arbeiten doppelt und dreifach zu machen? Ich habe in der letzten Zeit den Wochenbericht meistens gerade so fertig bekommen und das ein oder andere Mal eben auch nicht.

Meine Idee war eigentlich von Anfang an, das ganze soweit wie möglich zu automatisieren. Nicht das Kuratieren, sondern das posten. Kleinteiliges Sammeln die Woche mit einem Tool der Wahl, am besten dann automatisiert posten. Und das dann auch automatisch bei Twitter, LinkedIn und Xing veröffentlichen. Ein Traum wäre das.

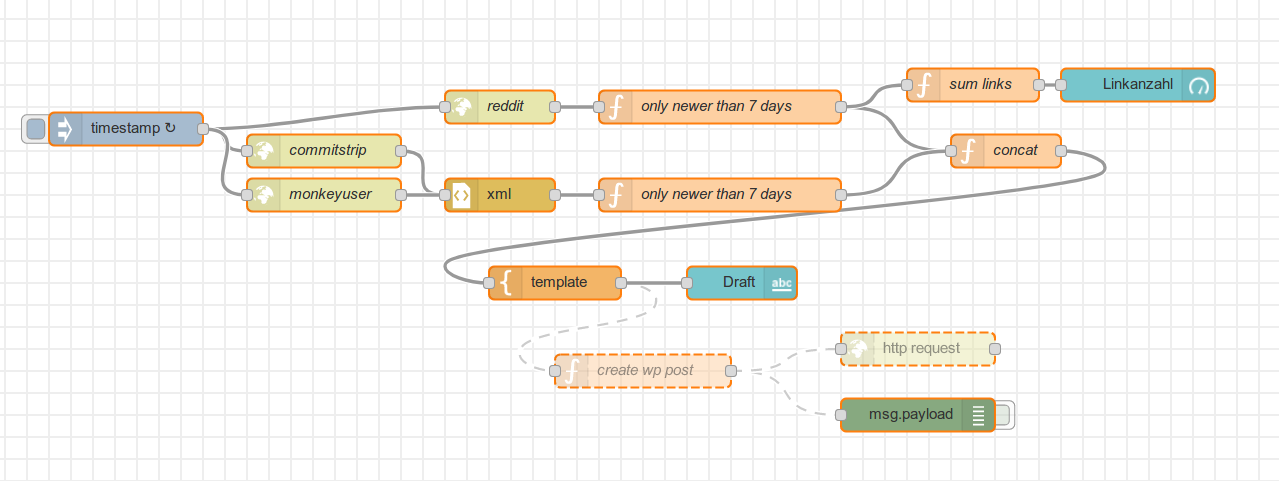
Nun bin ich vor ein paar Wochen über Nodemation und Node-RED gestolpert und der Plan schien fast aufzugehen. Ich habe nach einer Einarbeitung die letzten 2 Wochen viel über den Workflow mit NodeRED gelernt und hatte das ganze fertig bis auf den letzten Schritt (und einigem Fehlerhandling):

Fertig

  1. Subreddit abfragen und die Links zusammenführen
  2. RSS Feeds von Monkeyuser und Commitstrip abrufen und nur Einträge neuer als 7 Tage mitnehmen
  3. Alles zusammen in einem Template als OL und P nach dem bekannten Muster zusammenfassen.
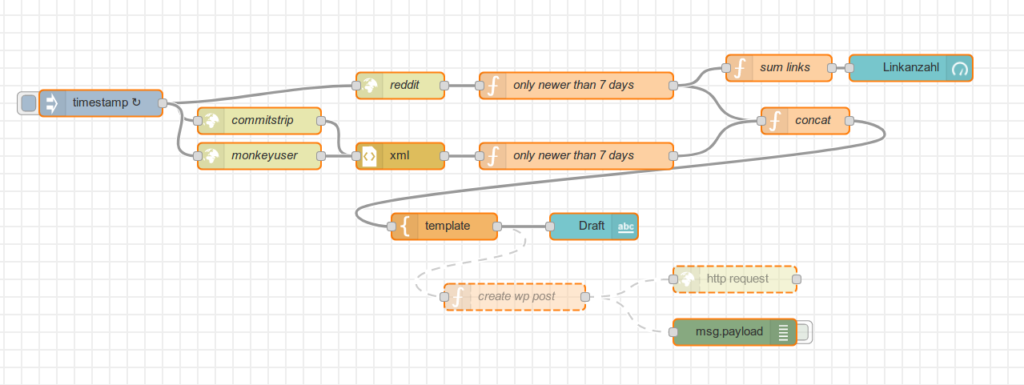
Screenshot meines Vorbeitungs-Workflows

Unfertig

  1. Posten an WordPress. Dazu müsste ich in dem Flow auch Authentication handlen um die WP-Rest-API zu bespielen. Das ist ein größeres Problem als Anfangs gedacht.
  2. Posten verhindern und mich benachrichtigen, wenn zuwenig Links im Subreddit sind oder kein “Was zum Lachen” aus den beiden Blogs ermittelt werden kann.

Pareto: Automate erstmal half the things.

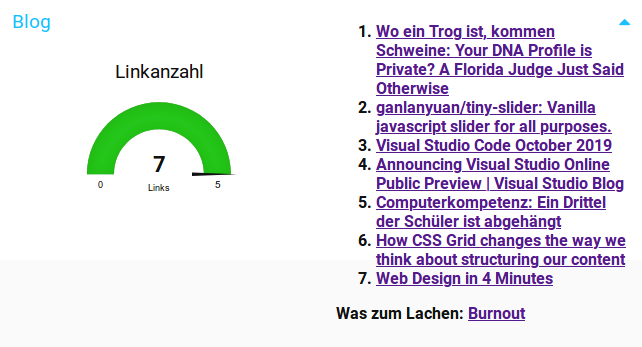
Danach bin ich auf das Dashboard-Modul von Node-RED gestoßen und habe das ganze dann als Dashboard-Widget umgesetzt. Damit sind die Probleme bzw. unfertigen Teile auch direkt abgehakt, denn ich bekomme einen Artikel-Entwurf in dem Dashboard generiert, den ich dann nur ins WordPress kopieren muss und ggf. korrigieren kann.

Natürlich muss ich Überschrift, Tags und Bild noch per Hand vergeben. Aber das Links hin- und herkopieren und suchen kann ich mir sparen. Der letzte Wochenbericht ist bereits mit dieser Unterstützung von Node-RED entstanden.

Den Pfad mit dem automatischen Posten habe ich allerdings noch nicht ganz aufgegeben, wie man dem Screenshot oben entnehmen kann.

Setzt ihr Projekte oder ähnliche Workflows mit Automatisierungstools um? Wenn ja, habt ihr Lust, diese hier zu präsentieren?

Kategorien
Allgemein Werkzeuge

Wie man Contentblöcke aus einem CMS in eine Vue-Anwendung integiert – ohne Ajax!

Die gängigen Translation Systeme für Single Page Applications (SPAs) sind nicht geeignet größere Contentblöcke für Redakteure einfach pflegbar und übersetzbar zu machen. Ihr Schwerpunkt liegt eher auf kleinen Strings und Labels. Vor kurzem haben wir in einem Projekt eine Möglichkeit gesucht, wie man größere Contentblöcke in eine SPA mit vue-router einbringt, die in Pimcore integiert ist.

Aufgrund des Aufbaus der SPA müssen diese Contentblöcke in Subrouten des Routers eingebaut werden. Die Inhalte per Ajax nachzuladen ist dabei zwar möglich, aber keine angenehme Wahl. Hier ist relativ viel Aufwand (Platzhalter, Loading-Anzeige, Errorhandling) nötig und es ist schwerer mit dem CMS von Pimcore koppelbar.

Die Lösung ist dabei eigentlich relativ einfach: Wir nutzen die Möglichkeiten des Pimcore Experience Managers, um größere Content-Blöcke backend-Seitig zu übersetzen.

Das Setup

Dazu muss man folgendes sicherstellen: Der Template-Compiler von Vue muss mit in das Bundle. Das ist er normalerweise nicht. Wenn man die Anwendung mit der vue-cli erstellt, wird eine Runtime ohne Template Compiler verwendet. Das kann geändert werden, erhöht die Bundle-Größe aber um ca. 10kB. Im Falle einer Anwendung, die mit der Vue CLI ab Version 3.0 gebaut wird geht das folgendermaßen:

// vue.config.js
module.exports = {
  runtimeCompiler: true
}

Für andere Build-Systeme oder Konfigurationen hat die Vue-Doku da noch ein paar Hinweise. Laravel Mix liefert den Compiler immer in der Runtime mit. Mit den 10kB können wir an der Stelle gut leben, unsere SPA hat wenig perfomancerelevanz und misst aktuell mit Template-Compiler ca. 60kB.

Was können wir damit nun anfangen?

Nach dem Setup haben wir nun Zugriff auf den Template Compiler, auch wenn die Vue-Anwendung schon gebundled ist. Damit kann man auch nachträglich Vues x-templates in die Anwendung laden und nutzen.

Also bauen wir uns eine Component, die nur ein x-template lädt und einbindet:

<script>
    export default {
        name: "HtmlInclude",
        props: {
            templateId: {
                type: String,
                required: true
            }
        },
        created() {
            this.$options.template = this.templateId
        }
    }
</script>

Das ganze wird folgendermaßen aufgerufen:

<HtmlInclude :template-id="'#mein-template'"></HtmlInclude>

In das HTML der app-aufrufenden Seite muss dann nur noch ein Template eingebettet werden, welches den Richtlinien von Vue-Componenten entspricht:

<script type="text/x-template" id="mein-template">
...
</script>

Wie sieht das ganze auf Seite des CMS aus?

In unserem Fall in Pimcore bieten wir dem Bearbeiter eine komplette Editorenmöglichkeit mit includes, wie er es gewohnt ist. Der entsprechende Contentblock wird beim Rendering der Page lediglich mit dem eben beschriebenenen x-template umschlossen; damit ist er unsichtbar, wenn er nicht aus der Vue-Anwendung geladen wird.